IntelliJ IDEA tutorial
IntelliJ IDEA by JetBrains is the Interactive Development Environment (IDE) used by most of the Egeria developers. The community edition is free to use and covers all the function needed by an Egeria developer.
See the overview video of IntelliJ on its homepage.
Managing your IntelliJ environment
Installing Intellij
Link to the download page and follow the instructions. Then start up IntelliJ and a wizard appears.
Loading Egeria into IntelliJ IDEA
Once you have a copy of a git repository on your local disk you can load the contents into IntelliJ.
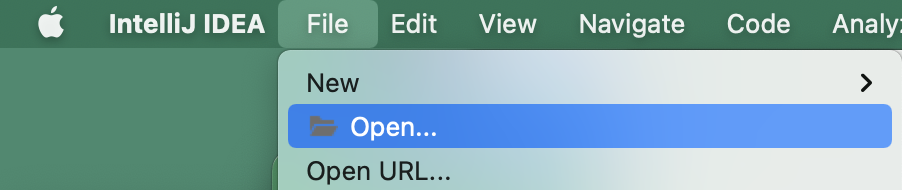
Go to the File menu and select Open
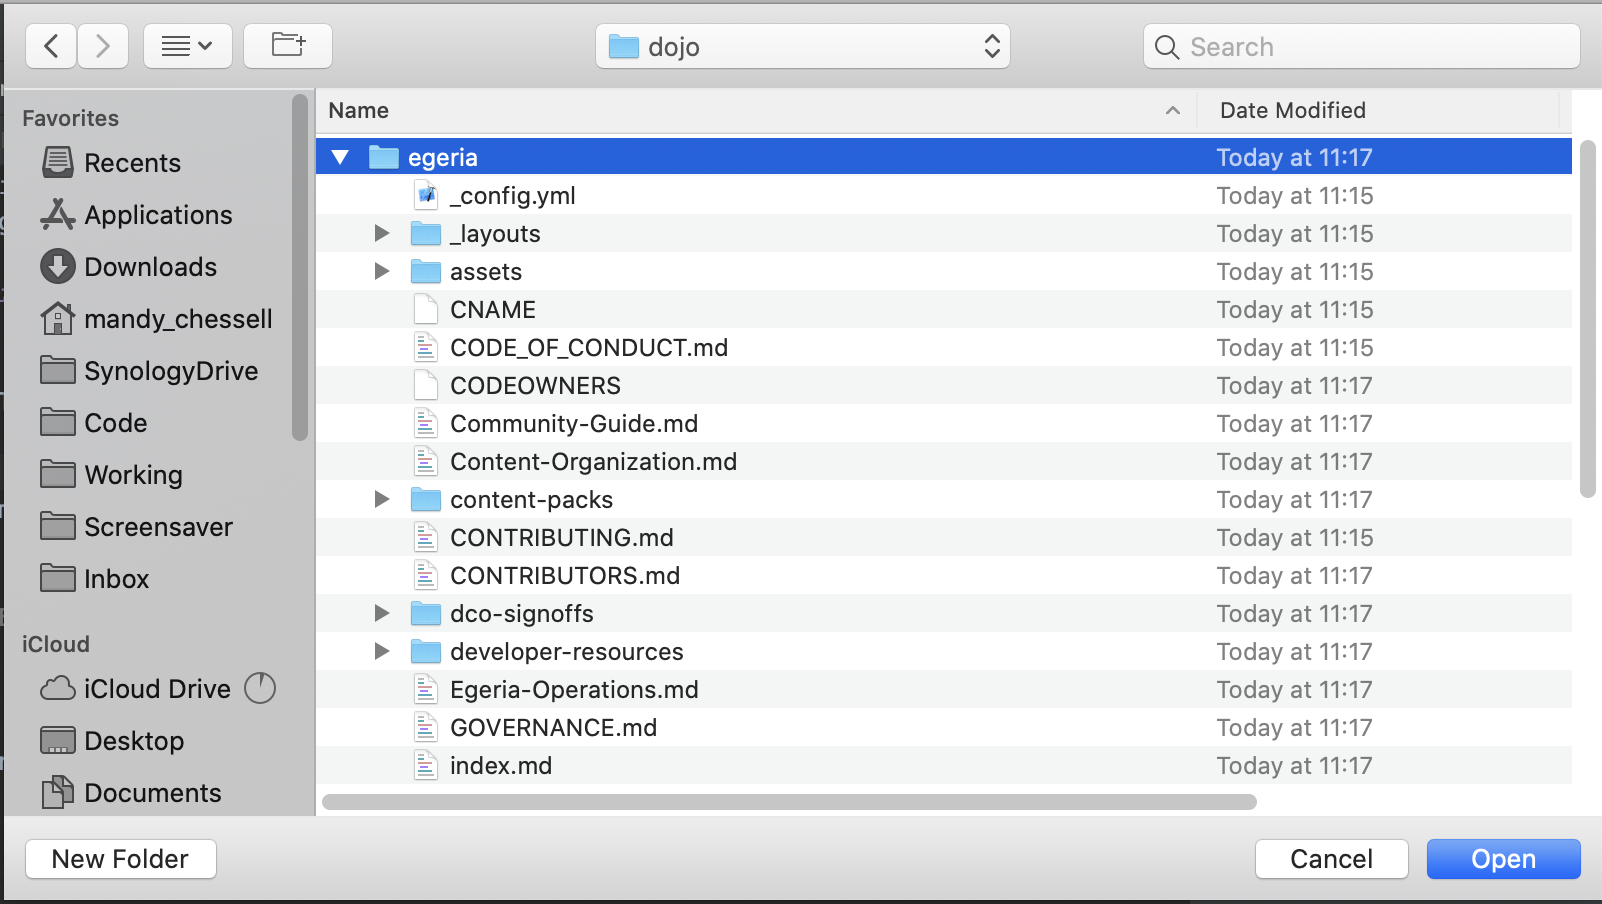
Then select the top-level directory that was created when you cloned the git repository.
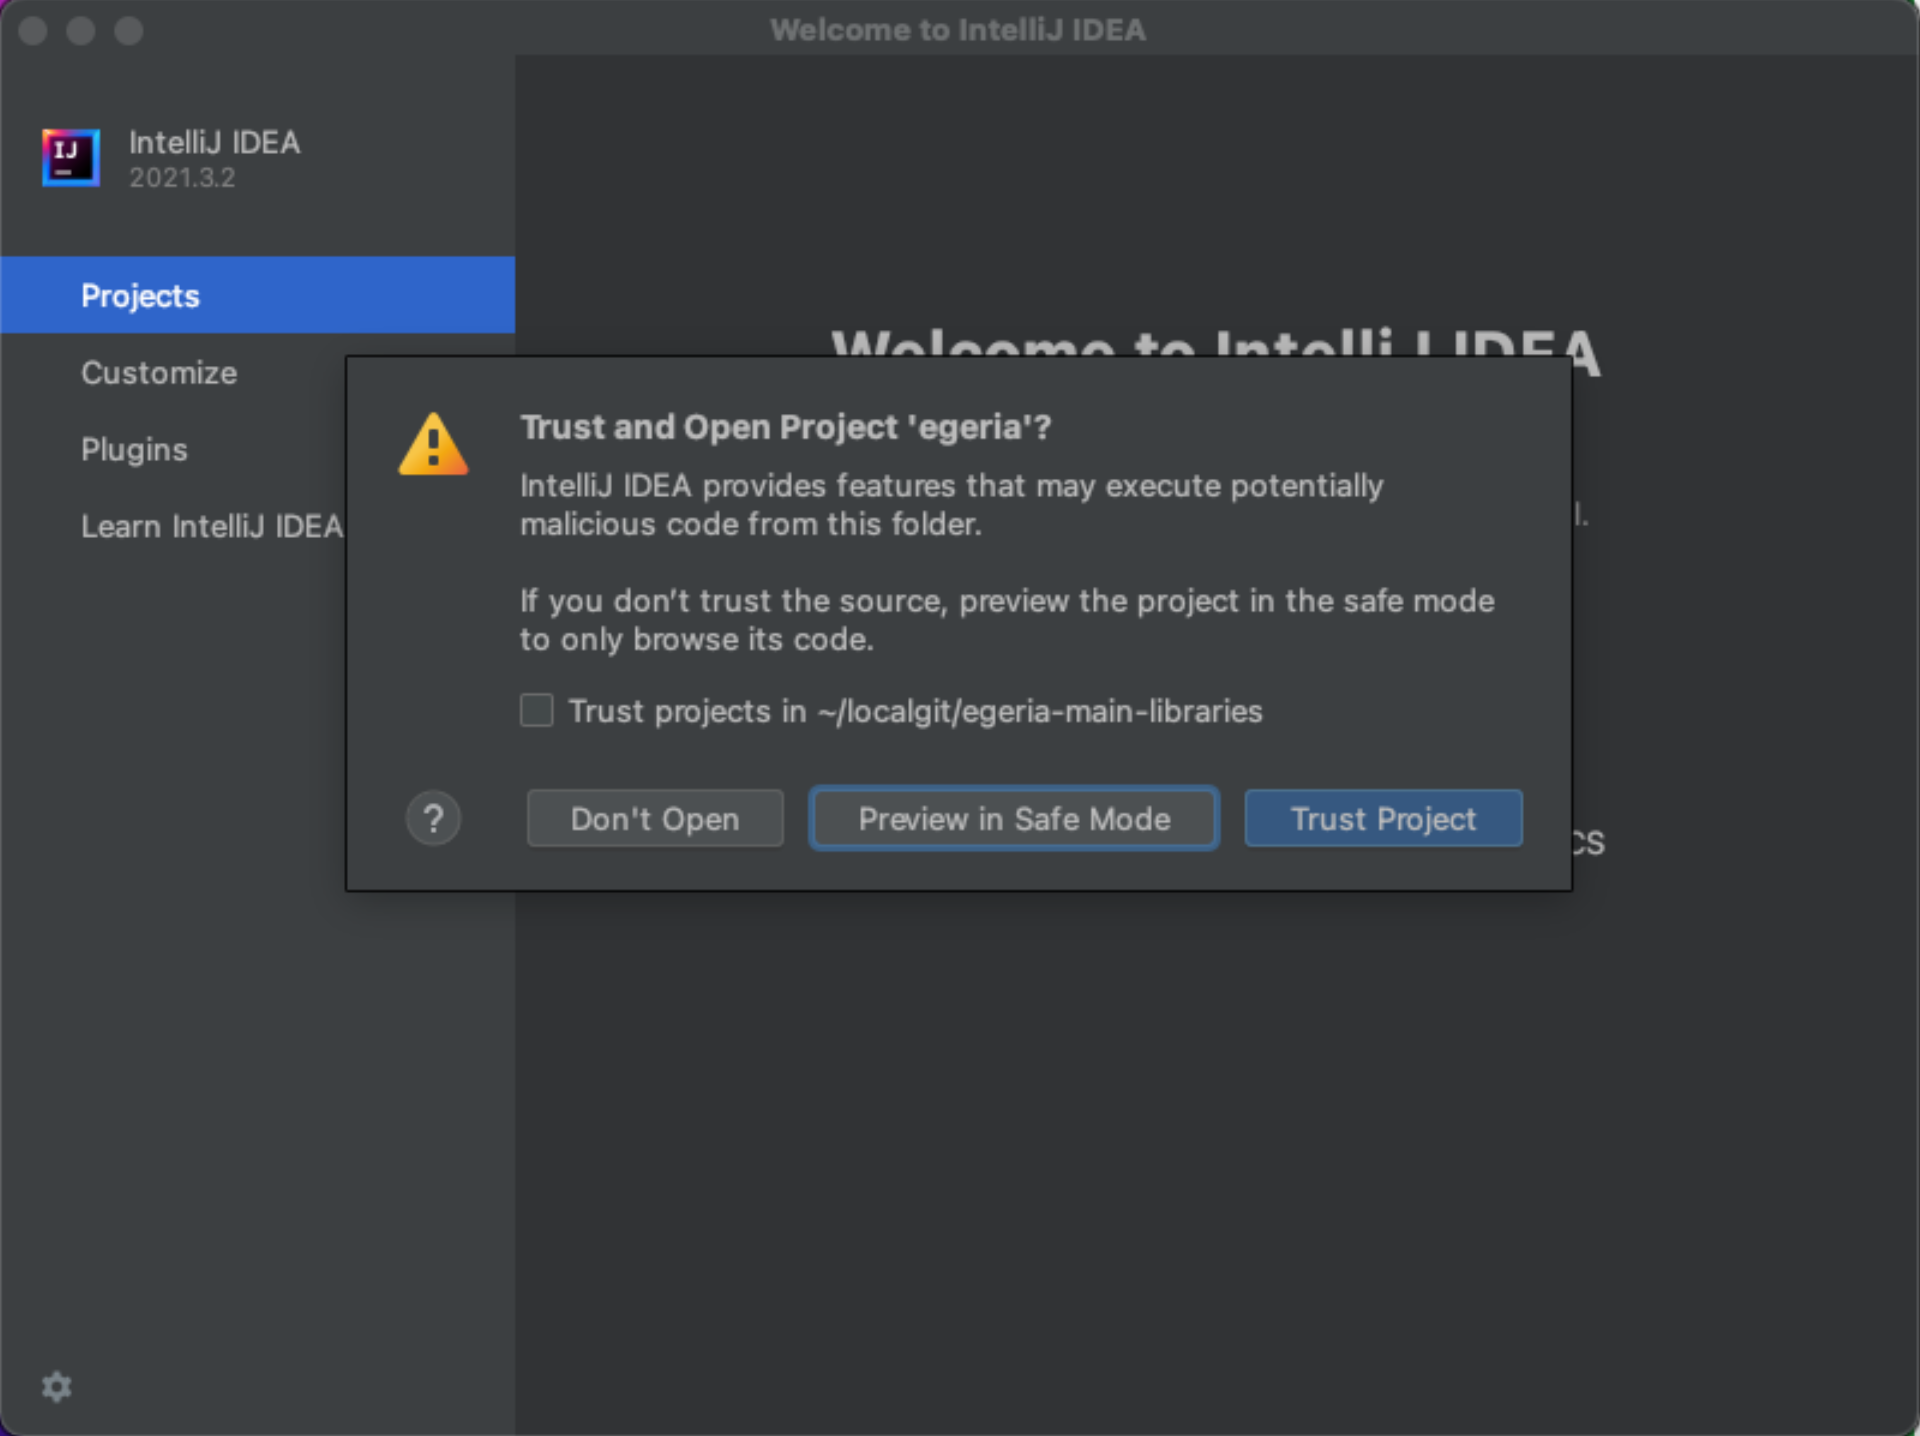
You may be warned about loading egeria in which case select Trust Project:
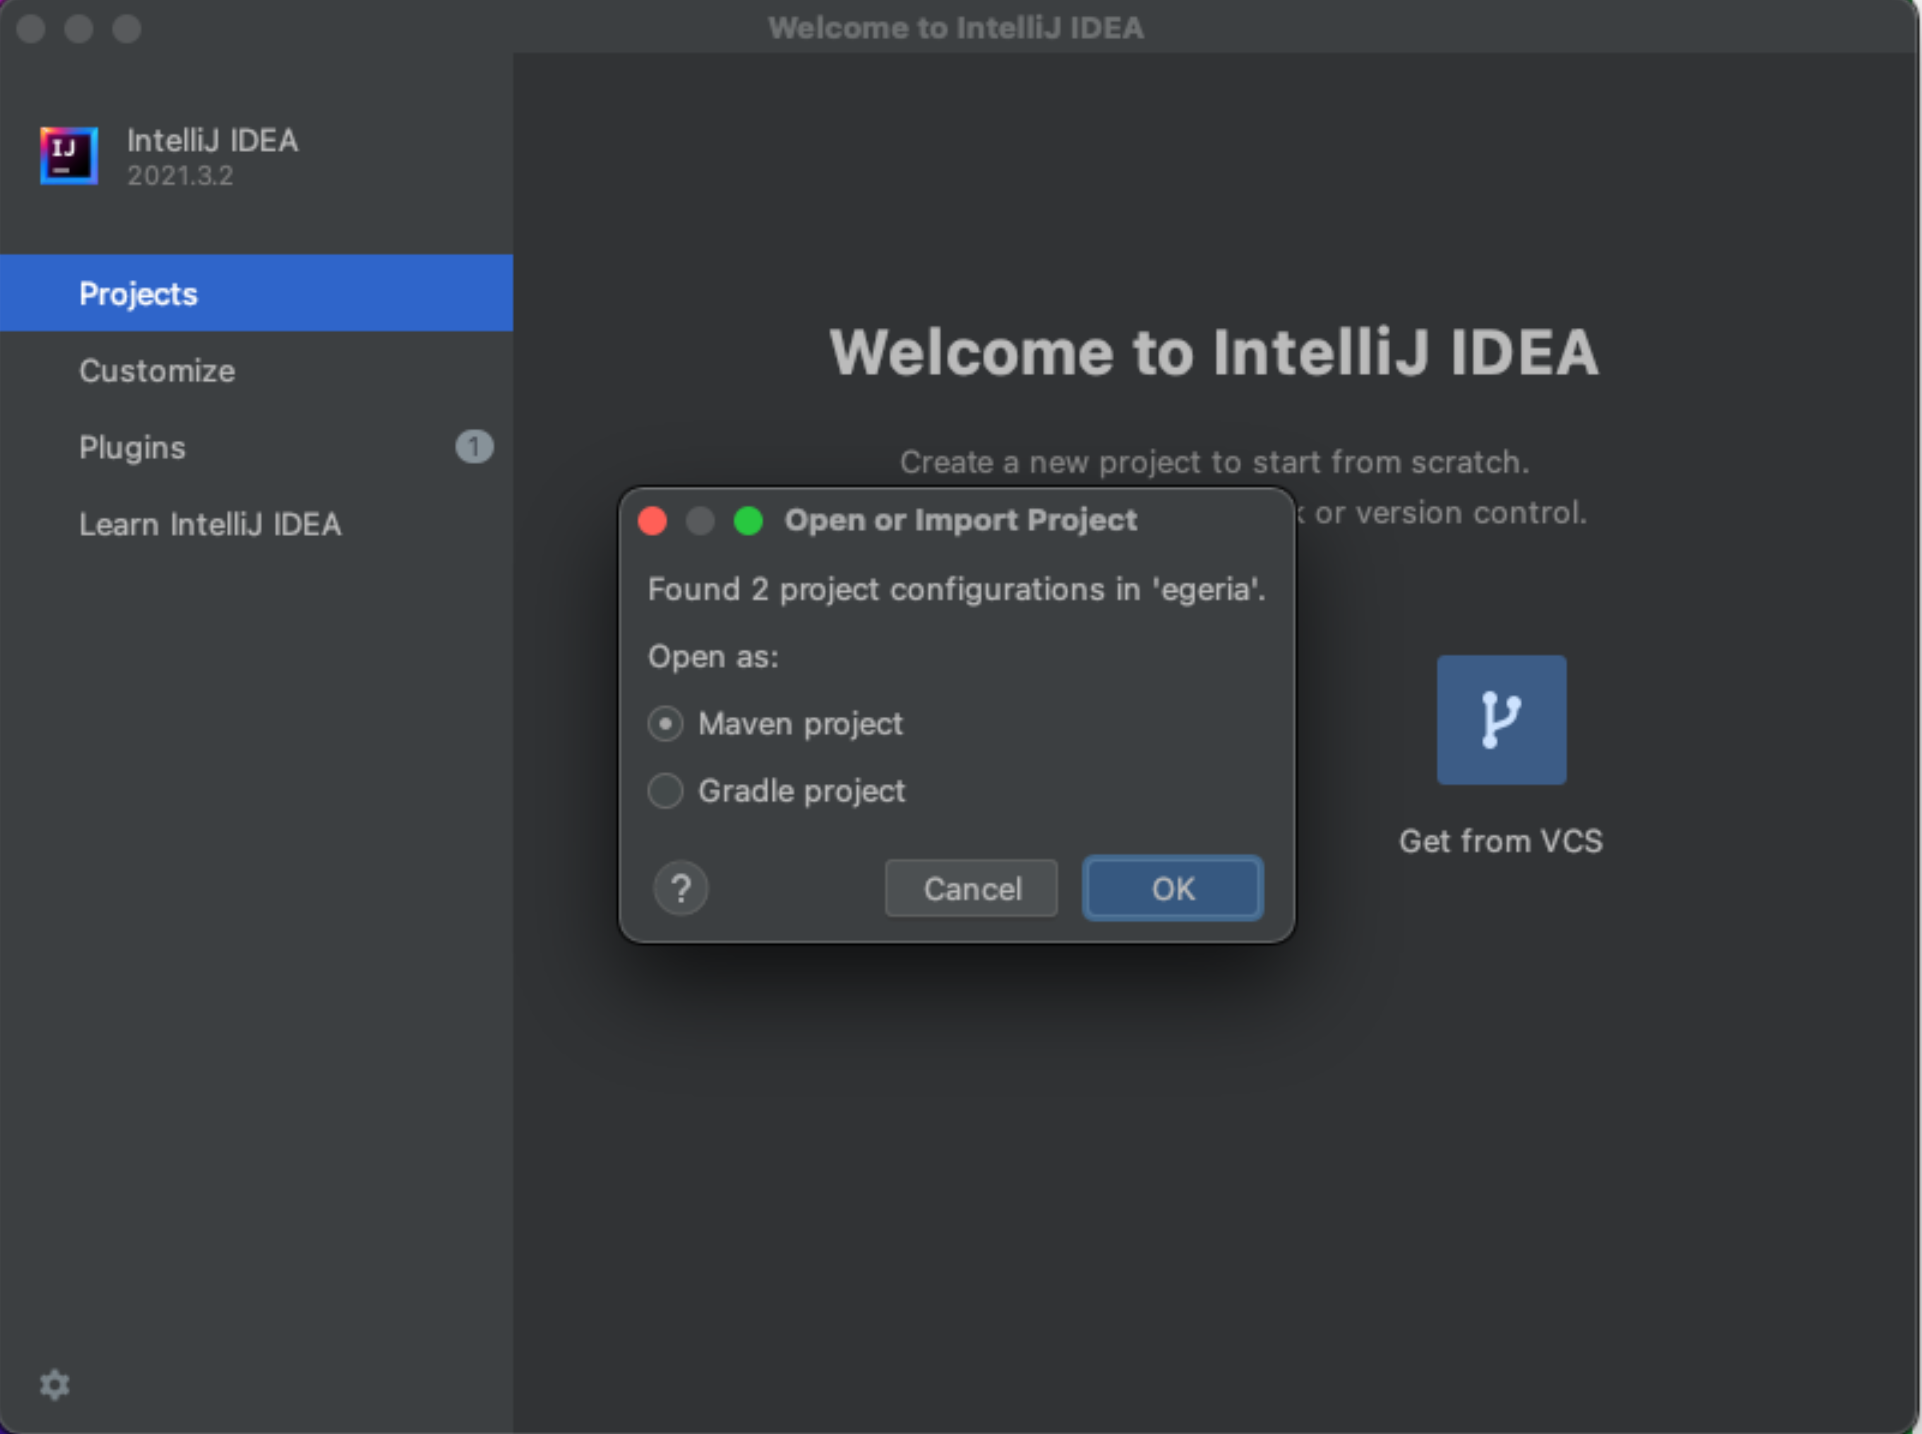
If asked which build approach to use, select Maven:
IntelliJ will then start reading the git repository and creating a project. This may take a few minutes so be patient.
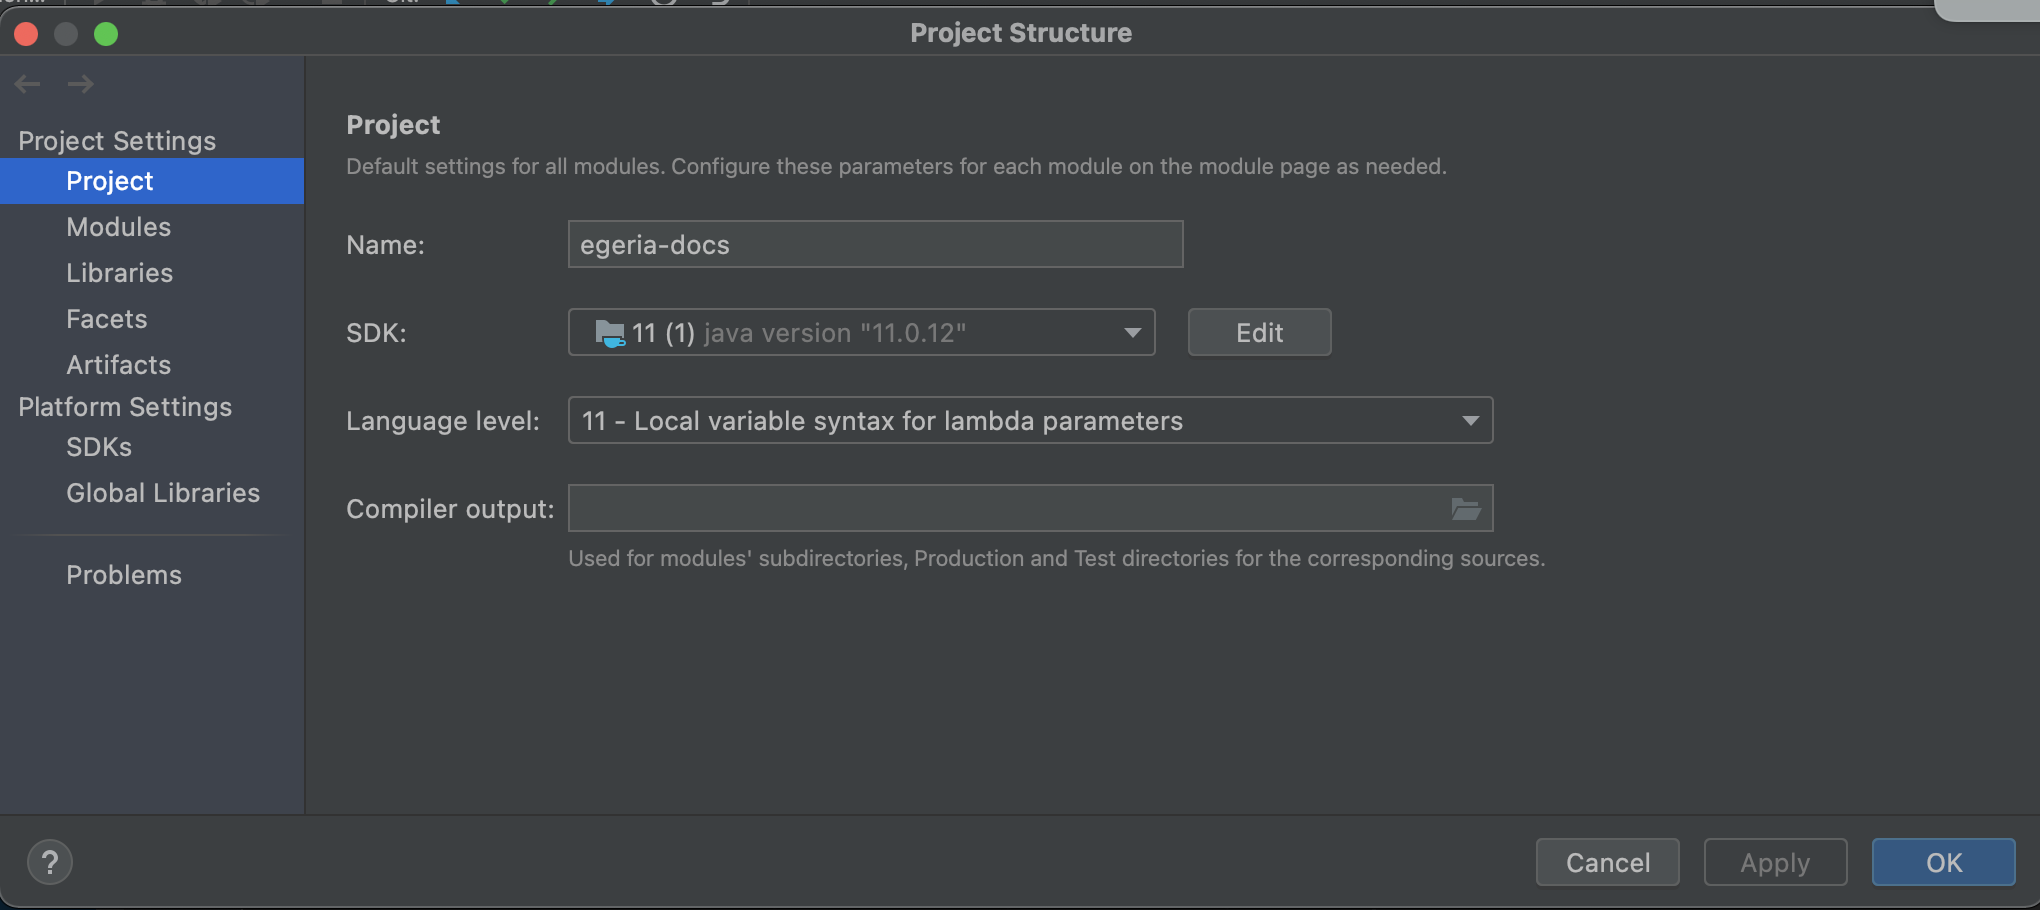
Validate that the project is set up with the right level of Java - you need Java 17. Select File and then Project Structure.... When the wizard opens select Project and ensure the SDK is Java 17.
Building Egeria in IntelliJ IDEA
The build process is different for each git repository. Click on the table for the repository that you are building:
Building egeria.git
Maven is accessed from a sidebar menu in IntelliJ.

When you click on the Maven label, a panel opens with the list of modules in the git repository is displayed.
Chose the build option for your work ...
The egeria.git repository has a top-level pom file so all the modules can be built using one command.
Select the M button at the top of the maven panel for Execute Maven Goal.

Then the Execute Maven Goal dialog box opens to enter your command clean install command.
The egeria.git repository has a top-level pom file so all of the modules can be built using one command.
Select the M button at the top of the maven panel for Execute Maven Goal.
Then the Execute Maven Goal dialog box opens to enter your command clean install -P quick -D skipFVT. This skips all of the verification of the project files and running tests. It is suitable for development projects (such when running the dojo). However, if you are experiencing problems with building this repository, use the full build option to verify the project directories.
If you are making small changes, you may wish to simply rebuild a single module.
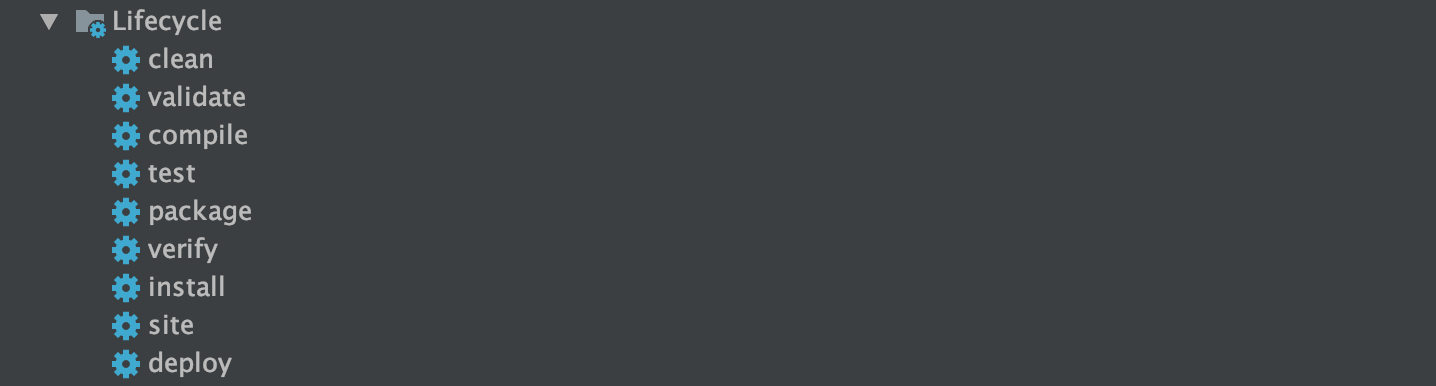
Goto the maven sidebar panel and find the module you are interested in. Open up the content for the module and then the lifecycle folder.
First double-click on clean and the build of that module runs.
Once the clean is complete, double-click on install and the build of that module starts.
Note: this option does not rebuild the assembly and so if you are using the OMAG Server Platform from the assembly to test your changes, you may need to do a full build to incorporate your change into the platform.
The build kicks off in a new pane (typically at the bottom of your IntelliJ window).
The build can take 15 minutes to over an hour depending on the build method and speed/load on your machine. However eventually you will see the message:
[INFO] ------------------------------------------------------------------------
[INFO] BUILD SUCCESS
[INFO] ------------------------------------------------------------------------
[INFO] Total time: 54:54 min
[INFO] Finished at: 2020-01-29T09:33:17Z
[INFO] Final Memory: 171M/3510M
[INFO] ------------------------------------------------------------------------

Process finished with exit code 0
Raise an issue or comment below
Building egeria-samples.git
Maven is accessed from a sidebar menu in IntelliJ.
When you click on the Maven label, a panel opens with the list of modules in the git repository is displayed. The maven:
The egeria-samples.git repository does not have a top-level pom file. Each sample is built separately.
Go to the module of the sample that you are interested in. Open up the content for the module and then the lifecycle folder.
First double-click on clean and the build of that module runs.
Once the clean is complete, double-click on install and the build of that module starts.
The build kicks off in a new pane (typically at the bottom of your IntelliJ window).
The build takes a few minutes depending on the speed/load on your machine. However eventually you will see the message:
[INFO] ------------------------------------------------------------------------
[INFO] BUILD SUCCESS
[INFO] ------------------------------------------------------------------------
[INFO] Total time: 54:54 min
[INFO] Finished at: 2020-01-29T09:33:17Z
[INFO] Final Memory: 171M/3510M
[INFO] ------------------------------------------------------------------------

Process finished with exit code 0
Raise an issue or comment below
Building egeria-dev-projects.git
Maven is accessed from a sidebar menu in IntelliJ.
When you click on the Maven label, a panel opens with the list of modules in the git repository is displayed. The maven:
The egeria-dev-projects.git repository has a top-level pom file so all of the modules can be built using one command.
Select the M button at the top of the maven panel for Execute Maven Goal.
Then the Execute Maven Goal dialog box opens to enter your command clean install and press Execute.
The build kicks off in a new pane (typically at the bottom of your IntelliJ window).
The build can take a few minutes depending on the speed/load on your machine. However eventually you will see the message:
[INFO] ------------------------------------------------------------------------
[INFO] BUILD SUCCESS
[INFO] ------------------------------------------------------------------------
[INFO] Total time: 54:54 min
[INFO] Finished at: 2020-01-29T09:33:17Z
[INFO] Final Memory: 171M/3510M
[INFO] ------------------------------------------------------------------------

Process finished with exit code 0
Raise an issue or comment below
Using maven rather than using the IntelliJ build?
While you are working on code in IntelliJ, it will be continuously rebuilding your code so that it is discovering syntax other coding errors as you type. This is useful in getting a first pass of your code.
However, IntelliJ does not understand the egeria structure - only Maven does, so the Maven build is important to to verify your changes are OK at the project level.
Installing Egeria
If your development work is using the main Egeria libraries rather than developing its contents, you may wish to install Egeria into a more convenient location on your local disk.
Click on the Terminal tab - typically at the bottom of your IntelliJ window - to open the terminal window. The working directory is positioned at the top of your project.

The egeria build process creates the distribution files for Egeria in the open-metadata-distribution/omag-server-platform module. To see its contents, after a full gradle build completes, use the following cd command to change to its build/distributions directory:
cd open-metadata-distribution/omag-server-platform/build/distributions
ls
egeria-platform-{release}-distribution.tar.gz or egeria-platform-4.3-distribution.tar.gz in this example.
egeria-platform-4.3-distribution.tar.gz
Create a directory for Egeria and copy the tar file into it. The two commands shown below creates a directory in your home directory and then copies the egeria distribution file into it.
mkdir ~/egeria-install
cp egeria*-distribution.tar.gz ~/egeria-install
This next command changes to the new directory.
cd ~/egeria-install
It is now possible to unpack the tar file with the following steps.
gunzip egeria*-distribution.tar.gz
tar -xf egeria*-distribution.tar
egeria-platform-{release}-distribution.tar.gz or egeria-platform-4.3-distribution.tar.gz in this example. Change to this new directory and list its contents as shown below.
cd egeria*gz
ls
Dockerfile      LICENSE         NOTICE
README.md       assembly        dist
The Dockerfile contains the directives to build a docker image. Instructions for doing this are in the README.md file. Change to the assembly directory.
cd assembly
ls
README.md etc opt platform
platform is a directory for the OMAG Server Platform that is used to run open metadata and governance services. This is the omag-server-platform-{{release}}.jar.
ls platform
README.md                  data       keystore.p12     logs                            truststore.p12
application.properties     extra      lib              omag-server-platform-4.3.jar
platform/lib directory is where the jar files for connectors, samples and new registered services are installed. It includes the connectors that are located in the egeria.git repository.
ls platform/lib
README.md                                                       csv-file-connector-4.3.jar                                      jdbc-integration-connector-4.3.jar
apache-atlas-rest-connector-4.3.jar                             data-folder-connector-4.3.jar                                   jdbc-resource-connector-4.3.jar
atlas-integration-connector-4.3.jar                             discovery-service-connectors-4.3.jar                            kafka-integration-connector-4.3.jar
audit-log-console-connector-4.3.jar                             dynamic-archiver-connectors-4.3.jar                             kafka-open-metadata-topic-connector-4.3.jar
audit-log-event-topic-connector-4.3.jar                         elasticsearch-integration-connector-4.3.jar                     omrs-rest-repository-connector-4.3.jar
audit-log-file-connector-4.3.jar                                env-variable-secrets-store-connector-4.3.jar                    open-lineage-janus-connector-4.3.jar
audit-log-slf4j-connector-4.3.jar                               files-integration-connectors-4.3.jar                            open-metadata-archive-directory-connector-4.3.jar
avro-file-connector-4.3.jar                                     governance-action-connectors-4.3.jar                            open-metadata-archive-file-connector-4.3.jar
basic-file-connector-4.3.jar                                    governance-services-sample-4.3.jar                              open-metadata-security-samples-4.3.jar
cohort-registry-file-store-connector-4.3.jar                    graph-repository-connector-jar-with-dependencies-4.3.jar        openapi-integration-connector-4.3.jar
configuration-encrypted-file-store-connector-4.3.jar            inmemory-open-metadata-topic-connector-4.3.jar                  openlineage-integration-connectors-4.3.jar
configuration-file-store-connector-4.3.jar                      inmemory-repository-connector-4.3.jar                           spring-rest-client-connector-4.3.jar
platform/extra directory is where connectors from other repositories are added (including those that you write yourself). Copy the jar files for any additional connectors you want to use into the extra directory. The connectors available for Egeria are listed in the Connector Catalog.
The opt and etc directories contain additional content that can used with the platform. For example, the etc/reports directory contains java programs that describe different aspects of the platform.
ls etc/reports
README.md component-id-report.jar database-report.jar egeria-platform-report.jar
opt/content-packs directory contains Open Metadata Archives that provide sample open metadata content. The README.md describes their content.
ls content-packs
CloudInformationModel.json                      CocoGovernanceProgramArchive.json               OpenConnectorsArchive.json                      SimpleDataCatalog.json
CocoBusinessSystemsArchive.json                 CocoOrganizationArchive.json                    OpenMetadataTypes.json                          SimpleEventCatalog.json
CocoClinicalTrialsTemplatesArchive.json         CocoSustainabilityArchive.json                  README.md                                       SimpleGovernanceCatalog.json
CocoComboArchive.json                           CocoTypesArchive.json                           SimpleAPICatalog.json
CocoGovernanceEngineDefinitionsArchive.json     DataStoreConnectorTypes.json                    SimpleCatalog.json
/opt/sample-data directory contains sample data that is used in various labs and samples.
ls /opt/sample-data/*
opt/sample-data/README.md

opt/sample-data/data-files:
CompDir-ContactEmail.csv        CompDir-ContactPhone.csv        Employee-Dept.csv               Location-WorkLocation.csv
CompDir-ContactList.csv         EmplSAnl-EmpSalaryAnalysis.csv  Employee-Employee.csv           Patient-Patient.csv

opt/sample-data/database:
ibm-db2         mariadb         postgresql

opt/sample-data/oak-dene-drop-foot-weekly-measurements:
week1.csv       week2.csv       week3.csv       week4.csv       week5.csv       week6.csv       week7.csv       week8.csv       week9.csv
Notice that each directory contains a README.md file that explains the content of the directory.
Developing new function with IntelliJ IDEA
Creating a new project
To add a new project to intellij, select New then Project from the File top-level menu of IntelliJ.

Select Java then set up the project SDK by selecting your Java 17 installed JDK and then click the Next button.
If this is the first time you are using IntelliJ you may need to click on the New... button and navigate to your install directory.

Leave the Create project from template option blank and simply click the Next button.

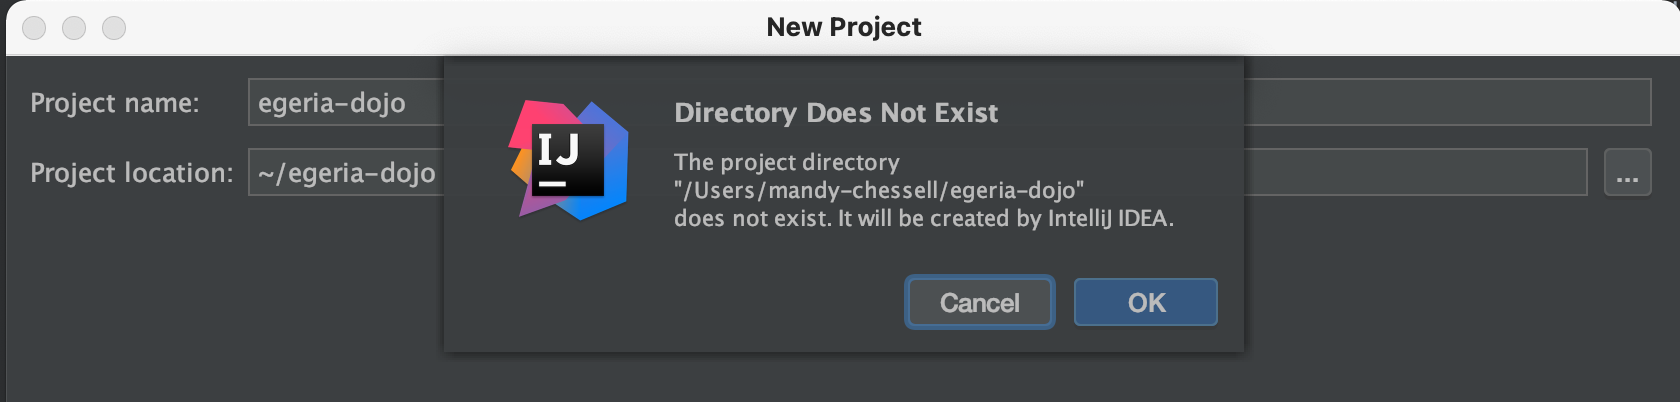
Add the name of the project in Project name and the directory where you want the project files to be stored in Project location.

Click on the Finish button. If the directory is new, you may get this pop-up to confirm that the directory should be created. Click OK.
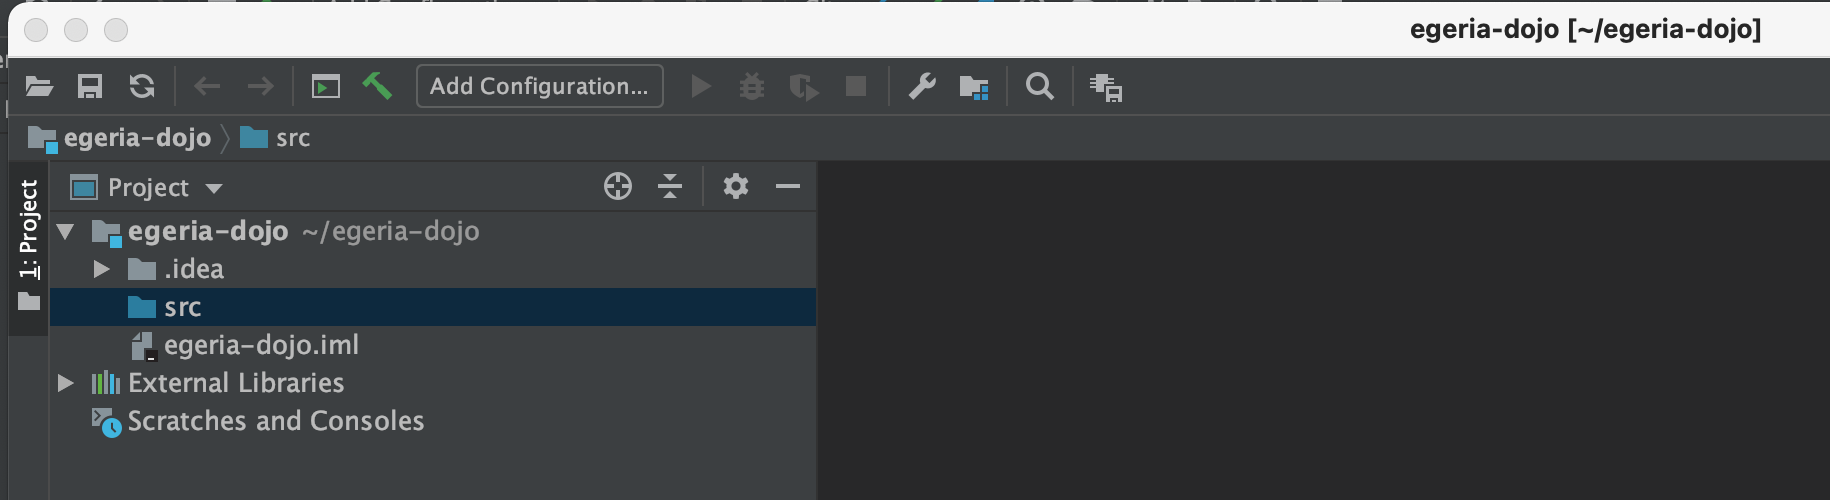
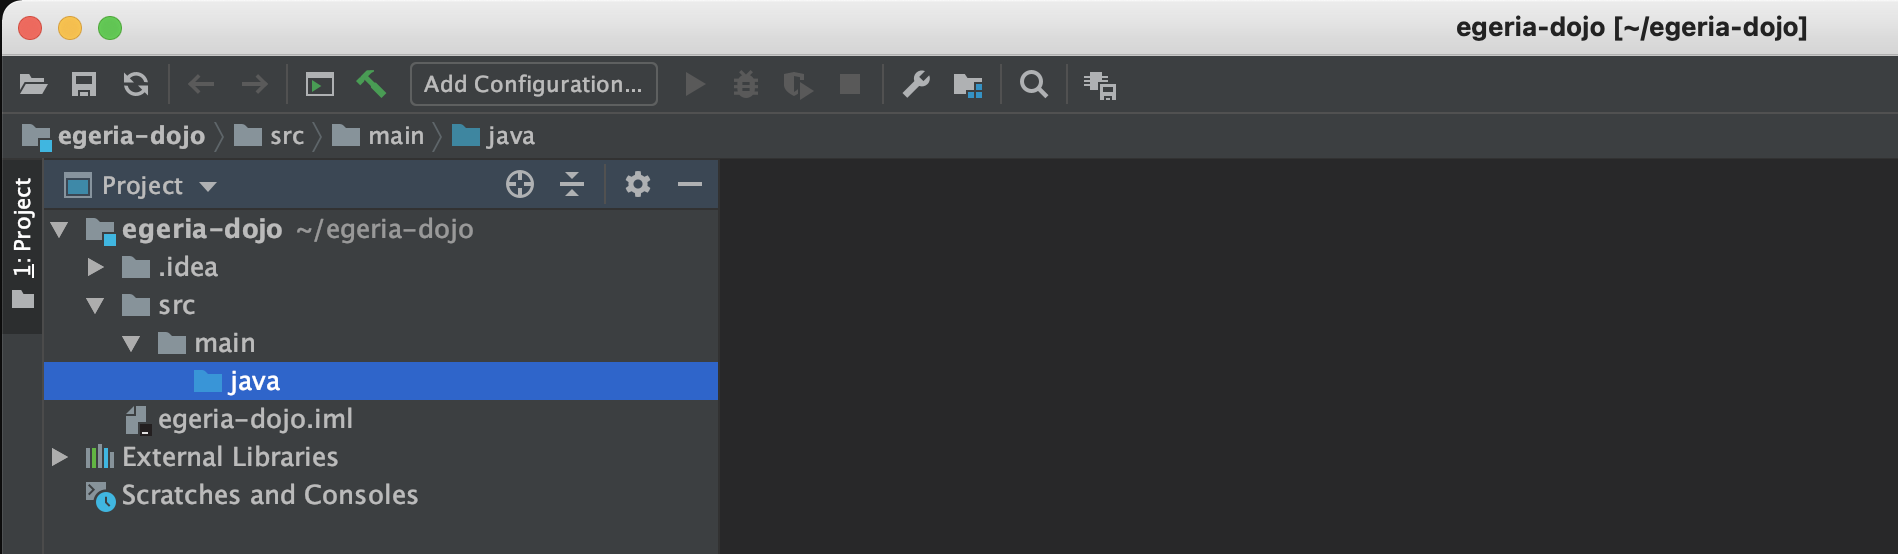
Once the wizard completes IntelliJ will open up your new project, ready to begin coding. The src directory is where your code will go.
Creating a new java package
To add a new Java package to your project, right-mouse click on the java directory.
Select New then Package on the sub menu.

A pop-up box appears asking for the name of the package. Enter your new package name and press the OK button.
Java package names are in lowercase and are dot (.) separated.

The new package appears under src in the project list.
Creating a new java class
To add a new Java class to your project, right-mouse click on the package name and select New then Java Class on the sub menu.

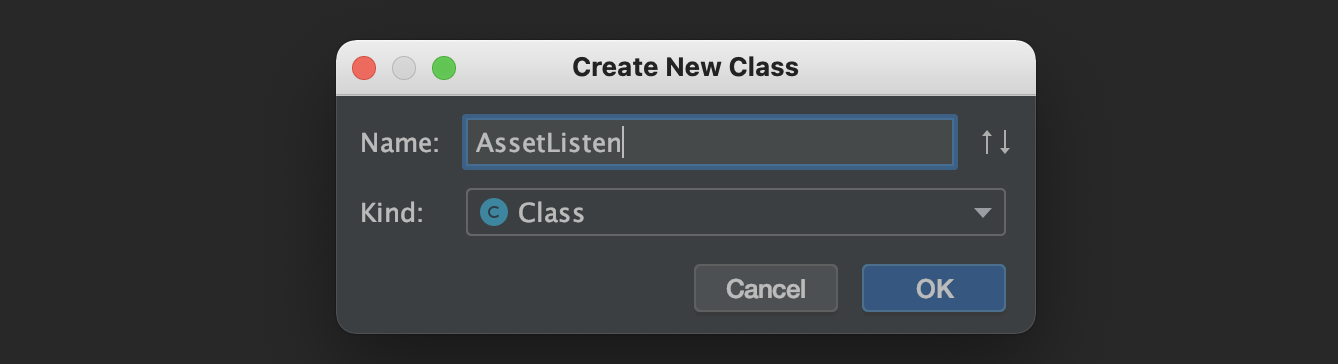
A pop-up box appears asking for the name of the class. Enter your new class name and press the OK button.
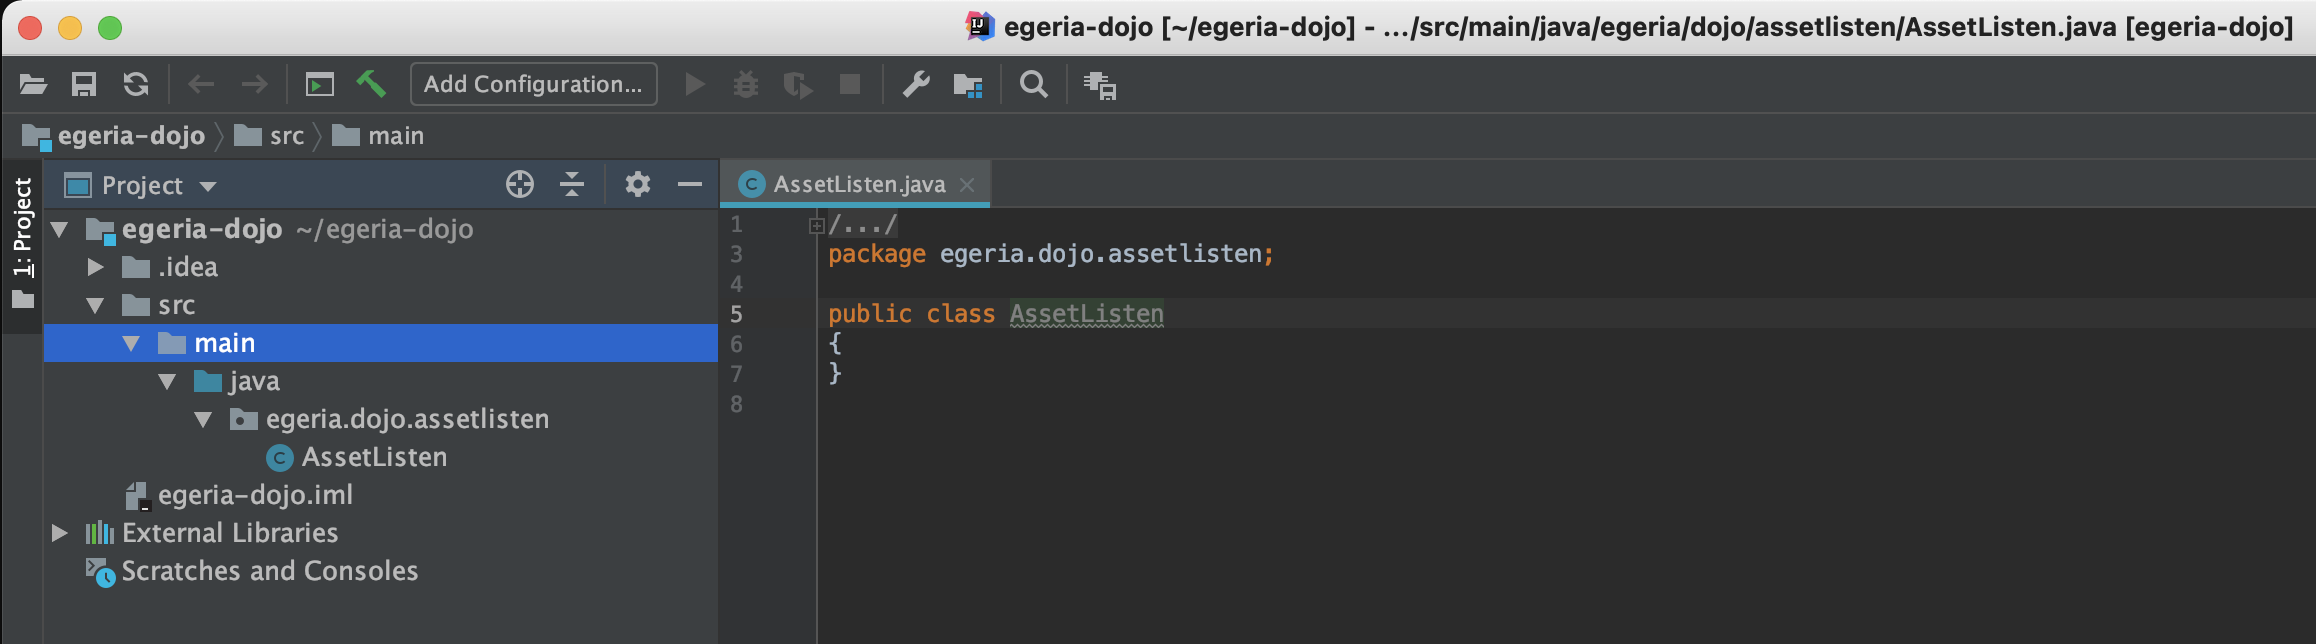
The new class appears in the project list and the source file is open in the editor.
Adding changes to Git
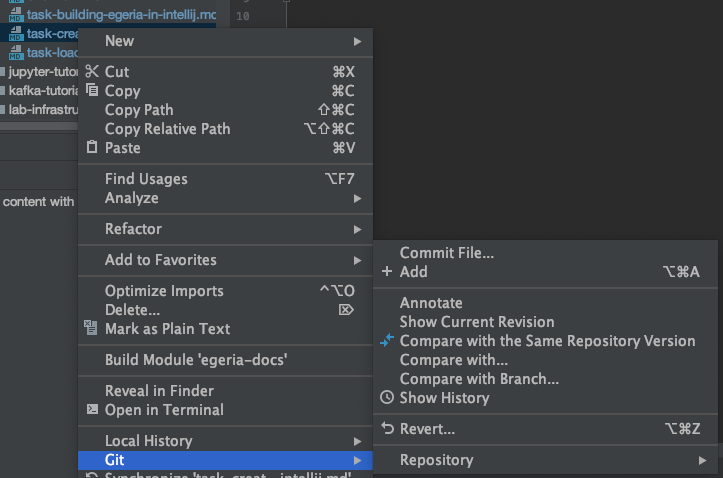
Any changes, additions and deletions that you make to the files under the git repository directory are automatically detected by git. It is possible to add these changes to your clone using the Add option on the Git right-mouse menu.
Raise an issue or comment below